Monday, October 31, 2011

Belated Birthday

Like many bloggers, my main reason for starting this blog was to have a virtual scrapbook of the events in my family's lives.  At the end of each year, I will have the entries from our blog made into a book so that we can also have it in print.  As I was looking back through some of the fun times we have had this year, one event was obviously missing.  I cannot believe I didn't blog about Ava's birthday.  How did that get by me?!  So even though her birthday was in March, I want to write about it so that it will be included in our book for this year.  

Ava turned four at the beginning of March.  I started planning her party in November.  I wanted to come up with a theme that would be fun for both boys and girls.  Ava loves inflatables so I thought I would try to incorporate a bouncy house somehow.  After some thought, we decided on a carnival theme.  Ava's "Uncle" Ty (our long time friend from high school) has a gym in Arlington where Ava has taken gymnastics.  In addition to the large gym area, there is a second floor with two large rooms.  We thought it would be perfect for what we had planned and Ty was nice enough to let us use the entire facility for a few hours on a Saturday afternoon.  So now that we had the place, it was time to work on the details--my favorite part!  I started brainstorming about things that you see at carnivals:  games, face painting, balloon animals, popcorn, cotton candy, etc.  The ideas just kept coming and I starting getting really excited.  I booked a moon bounce (with a slide per Ava's request), found a face painter/clown, and discovered an amazing balloon guy at my niece's birthday party.  With those things lined up, I began to work on the food, games, and decorations.  I found a lot of items through Oriental Trading and my mom and I worked to make the games ourselves out of items that we had around the house.  I asked family members and close friends to help out with running the games and other activities.  They were all happy to help and we couldn't have done it without them.  I took some wording ideas from invitations I had seen online and came up with this to send out as the invitation:
Finally it was time for party day!  As the guests were arriving, we had circus music playing but honestly I think it was so loud that you couldn't hear it.  I had the 2 1/2 hours planned out so that the 20-30 kids would come in and visit the ticket booth at the door to get a bag of tickets to use for each game and for food and also a spongy clown nose.   Kevin tracked down a refrigerator box after a couple of weeks of stalking our local Sears, Best Buy, Lowe's, etc (who knew it would be so difficult to catch one before it was broken down!).  Yay for good daddies!  We went at the box with a box cutter and hot glue and turned it into a ticket booth that my grandmother sat in to hand each child their ticket bag.  My mom and I also took a box that held copy paper and wrapped it with wrapping paper, found clip art images of cotton candy, lollipops, popcorn, and animal crackers to decorate it, and tied a long piece of ribbon around each handle on the side to make a "vendor" box for my grandfather to walk around with and pass out the food.  I found the big, swirly lollipops from Oriental Trading, the old-fashioned boxes of animal crackers at Target, rented a popcorn machine to make fresh popcorn, and had a company out west make individual bags with four different flavors of cotton candy.  The kids could "pay" one ticket and get one of each item.  Here are my grandparents getting ready to get the party started--aren't they cute!
After the kids got their ticket bags, they went over to a table to decorate their prize bags.  I got some plain white gift bags at Michaels and ordered some foam animal stamps and carnival stickers for them to decorate their bags any way they wished.
Mr. Mike, the balloon man, made Ava several balloon animals throughout the party. 
He also made her this cool birthday hat.
Before the afternoon was over, "Uncle" Doug ended up with the hat.
Mr. Mike was very popular throughout the whole party.  This man can make anything out of a balloon.  Hands down the best balloon person we'd ever seen.

Here are Ava and our nieces getting their faces painted with the clown from Tinker Tunes & Balloons.
Each child was a winner at each game, of course, and they got to stuff their prize bags with all kinds of treats from the Dollar Tree.  I think I decimated the toy aisle several times in the weeks before the party.  Some pictures of the games we made:
My sweet sister-in-law, Donna, ran the Ring Toss.
Ava's cousin, Lawson, had fun fishing in the Duck Pond.
My BFF, Amy, was in charge of Tin Can Alley.  My mother-in-law, Liz, is also helping out here.
Ava's friend, Aly, is getting ready to do the Ping Pong Toss.
We also had the classic Pin the Nose on the Clown.
Tee Shot (I thought Kevin would appreciate this one because I incorporated his golf tees)
A lollipop tree and a "Guess How Many?" with animal crackers.
After about an hour, we all moved into a smaller room where we had the cake and presents set up.  
Here is Ava opening two of her favorite presents this year.  The twin baby dolls with a double stroller from her cousins Lawson, Addison, and Austin and a beautiful doll house from my mom and dad.

After cake and presents, it was time to go downstairs and play in the gym.  We rented a large bouncy house with a slide but we also had a smaller one for the younger kids.  This is what our child did the entire rest of the afternoon.
The kids seemed to have a blast (I know Ava did!) and I think they were all ready for a nap when it was time to leave.  As a last little thank you for coming, I made cupcakes and decorated them to look like popcorn and put them in individual carnival cupcake boxes.  Each child was given one on their way out.
This party involved a lot of time and planning and work but it was so much fun!  Thank you again to anyone reading this who helped us to make it a success!  I love to plan events like this and I'm always trying to think of unique things to do.  So far, Ava has loved it and she hasn't requested birthday parties at Pump It Up or Chuck E. Cheese so as long as she is happy we'll keep doing it!  I've already got some ideas brewing for next year and it's about time to start planning.  It seems that someone is really into Fancy Nancy right now....

Also, for those of you that were there with your kids and are wondering why there are not pictures of them--my mom took pictures for us throughout the party and later when I got them, I realized that she mainly focused on taking pictures of Ava with her cousins.  Next year, we'll do better at taking pictures of Ava with her friends!!

Thursday, October 27, 2011

Tricks and Treats!

Ava's Halloween party at school was this morning and I've spent the last couple of weeks gathering supplies to make treat bags for her classmates.  I found two cute ideas on Pinterest that I wanted to use and then I just needed to come up with a way to package them.  The first thing I made were these fun little jack-o-lantern puzzles made from popsicle sticks that I painted.  It's pretty self-explanatory but here is the link for the tutorial if you are interested: http://go.tipjunkie.com/ha/158/www.saltwater-kids.com/2010/10/jack-o-lantern-puzzle-favors-tutorial_29.html.  I did make a couple of changes--the tutorial uses tempera paint which I tried and found that the wooden craft sticks just soaked it right up.  I did four coats on each puzzle and it still had a streaky, washed out look.  So, I just picked up some acrylic paint instead and one coat of that was all that was needed.  I also did not use a stencil.  Kevin is great at drawing so I just had him freehand the pumpkins onto the sticks.  He walked away for a moment and came back to find Ava was being helpful by coloring in the eyes, noses, and mouths with a Sharpie.  Usually she is really good about staying in the lines, but this time not so much.  So I ended up just painting over the marker and honestly some of the pumpkins looked a little messy but that is okay because she was helping me make stuff for her friends.  I am getting a little better about giving up control--just a little. :)  I then took the puzzles apart and placed them in pumpkin treat bags.  I printed the label on card stock, punched a hole in it, and tied it on with pumpkin ribbon.
I also put together the ingredients for individual s'mores using fun size Hershey bars, a sheet of graham crackers, and ghost Peeps.  I also found pumpkin Peeps but since we had the pumpkin puzzle, I went with the ghosts.  I found the Peeps at Target and have not seen them anywhere else though I haven't really been paying attention.  
Now to put it all together-- I found some small fabric bags in orange, black, and lime green in the dollar section at Target.  There were three of each color for $1.  I grabbed two of each color and then went to Michael's where I found small wooden cutouts of a ghost, a cat, and a spider.  I painted one of the designs on each bag and added googly eyes.  Then I found these cute labels, printed them on card stock, punched holes, had Ava sign her name on the back, and then attached with orange and white ribbon.  Here is the link for the labels:  http://eighteen25.blogspot.com/2010/09/todays-project-happy-halloween-tags.html.  The bags turned out to be the perfect size to hold one of each treat!

That's it--fast, easy, inexpensive, and cute!  I hope Ava's friends enjoy their trick and their treat!

Tuesday, October 25, 2011

Meal Planning Made Easy!

I am an avid blog reader.  If I find a blog that I really enjoy and that would be useful in my life, I subscribe to it--currently about 25 blogs fit this bill.  At this moment, my absolute favorite blog is 
It sounds dramatic but Jen at http://iheartorganizing.blogspot.com has been revolutionizing my life for the last few months.  She has the gift of organizing absolutely anything and is kind enough to share her methods for the rest of us not-so-gifted-in-the-organizing-area.  I have been working on implementing many of her ideas into our home.  One of the first projects I wanted to tackle was streamlining my meal planning process.  Thanks to Jen's help, I now have it down to a science and I wanted to share how I have taken the headache out of this task.
Kevin and I have been married for seven years.  It wasn't until a few years ago that I began cooking regularly.  This wasn't because I don't like to cook or because Kevin doesn't like my cooking--in fact, I do and he does!  It was just that each evening we would find ourselves saying "What do you feel like for dinner?"  "I don't know, what do you want?"  "I don't care, let's see what we have."  Everything was so last minute.  There was no planning involved.  Inevitably, we wouldn't have all the ingredients to make what we wanted and we would just get frustrated and end up going out for dinner.  Eating out all the time is not good for your wallet or your waistline and I finally grew sick of it.  We started meal planning once a week and would make a list on whatever scrap paper we had lying around.  We found ourselves eating the same things over and over because my recipes were in disarray and I didn't want to go through them.  I have 15 different cookbooks but couldn't remember which recipe was in which book.  Putting dinner on the table for your family each night can be stressful and I was bound and determined to find another way.  This is my new way and I HEART it! :)  
I usually try to do my meal planning on Sunday afternoons after church.  However, weekends are typically pretty busy for us and sometimes I don't have time until one morning during the week.  Just find a day that works for you but realize that you may have to be flexible.
First, gather up all your supplies.
-recipe binders
-weekly menu planner
-meal planner/shopping list
-grocery store ad
-coupon file
-beverage of your choice (because this will take a little while)

Here is how I have organized my recipes:
I purchased a cute photo album from Joann's at 50% off.  The album holds 4X6" pictures which made it the perfect size for my recipe cards.  The album also protects my recipe cards from spills (I am a VERY messy cook!).  I simply divided up my recipe cards into categories (breakfast, breads, salads, side dishes, main dishes, and desserts) and then loaded them all into the album.  I used a binder clip to attach my blank recipe cards to the front of the album so they are always easy to find and readily available.
I then got some Post-It tabs from Target, labeled them with my Sharpie, and placed them in the album as dividers.
As for my recipes not on cards, I picked up a 2.5" three-ring binder also from Target.  I found a free printable for both the cover and spine at Prudent Baby: http://www.prudentbaby.com/2010/01/recipe-binder.html.  They have several different colors from which to choose.  On the inside pocket of the binder, I placed take-out menus from our favorite to-go places.  When we need something quick or I just don't feel like cooking, we grab one of these menus and make the phone call.
I love page protectors and use them whenever I can, so I placed a bunch in the rings.  In the first sleeve, I placed Jen's Recipe Reference page.  On this page, you can list a recipe, what cookbook the recipe is in, and the page number.  Now no more wondering where you saw that recipe!
The Recipe Reference page is available as a free printable on Jen's blog so run and grab yours!  Then I just grabbed that big messy stack of recipes I have printed off the internet (or lately Pinterest!) or torn out of magazines.  If the recipe was printed on a full-size sheet of paper, I just stuck it in the sleeve like so:
If it was not full-size, I glued it onto some colorful cardstock first.
I then used the same method of applying the Post-It tabs with the different categories.
So now my recipes are all neatly organized and I have a plethora of menu options to choose from.  
The second item I use is this weekly menu planner I printed from the Creative Living blog at http://issasarza.com/freebies/weekly-menu-planner/.  

I took the planner and laminated it (who knew you could buy really good laminator for $25?!).  As I decide what we are having for each meal, I write it on the planner with a dry erase marker.  Then I just pop it onto the fridge as a quick reference during the week.  It also lets Kevin look to see what fine cuisine he will be dining on each evening. :)
I also have to have my menu planner/shopping list that I found at http://theprojectgirl.com/downloads/theprojectgirl.com-mealplanner.pdf.
This sheet has a place to list your menu for the week and then includes an area at the bottom for your shopping list.  I love that the shopping list is divided into sections of the store (canned goods, dairy, frozen foods, etc.) so that I don't find myself walking back and forth across the grocery store.  I keep a stack of these pages printed out and on a clipboard.  I found a plain wooden clipboard at Target, decorated it with scrapbook paper and some embellishments, and then had Kevin drill some holes into it.  I stuck a cute ribbon through the holes and then hung it from a Command hook in our pantry under my spice rack and mine and Ava's aprons.  It's handy there and super easy to grab when we realize we are out of something and need to add it to our grocery list.
Finally, I grab my coupon file and my grocery ad so that I can plan more frugally.  When our grocery ad comes in the mail on Tuesday, I go on and stick it on the clipboard so it does not get lost in the shuffle before meal planning day.  I also go on and clip the coupons that come in the mail on Tuesdays and file them in this accordion file.
This system saves me so much time and stress!  I have found that we make fewer trips to the store and are eating healthier too.  I make sure as I am planning not to have more than two dinners with red meat and to always fill in the other nights with fish, chicken, pork, etc.  
If you don't have a meal planning system, I encourage you to try it.  I also encourage you to check out Jen's blog as well as the other ones I mentioned.  There are so many great ideas out there and who has time to reinvent the wheel!!  Happy meal planning!

Sunday, October 23, 2011

Let the Halloween festivities begin!

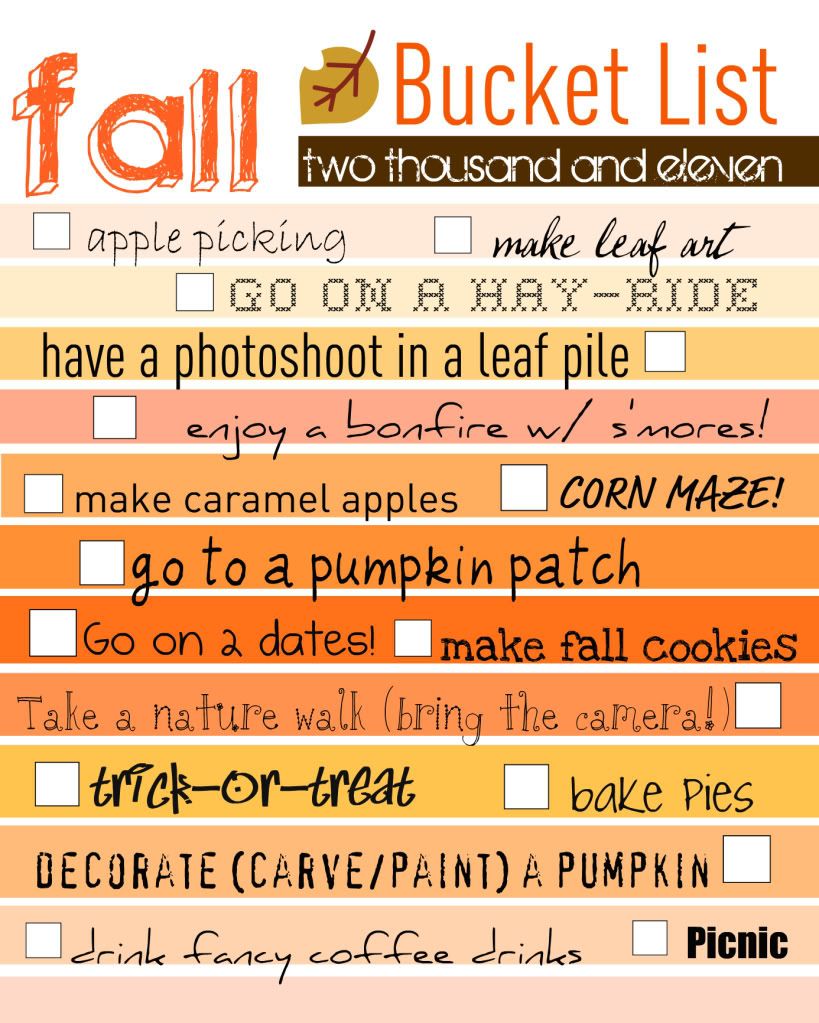
This weekend, we kicked off the first of this month's Halloween festivities and starting marking some things off of our fall bucket list.
(If anyone knows how to get rid of that annoying flash in the middle of the pic and could let me know, that would be awesome!)
Friday night, Ava got dressed in her costume for the first time to attend our church's Fall Fun Fest.  Here she is in her ladybug costume.  
This is the back.
A close up...
And for some reason, she wanted me to take a picture of her shoes.
Kevin and I went and picked up our nieces on the way so that my brother-in-law and sister-in-law could get some Christmas shopping done.
Daddy and his little ladybug.
We love that our church goes all out and always puts on amazing events, but that also means the events are very popular.  We waited in line for 45 minutes for the girls to do the bungee jump.
The girls played games to win candy....lots and lots of candy.

There were tons of inflatables to play on, a BMX show, laser tag, an illusionist, rock walls to climb, puppet shows, and even an amazing fireworks show at the end of the night.  We had a great time and worked up an appetite so we took the girls to Swanky's for dinner.  The evening wore them out and this is what happened as soon as we got in the car to head home.  
You can't see her but Mallory is back there in the third row passed out as well.  
Saturday, we worked on a Halloween craft--we made a ghost family using our feet!  Ava got a kick out of painting our feet for us.
Here is our completed artwork:
I discovered two things while doing this project.  One, I have extremely high arches.  Two, my feet are almost as big as Kevin's.  Sigh.  I guess as tall as I am, I would look weird with little feet.
Today, we went to church then had some lunch at Lenny's.  It was drizzling and gray but we had planned to go to the Agricenter for the corn maze.  We usually have so much going on that I try to plan our weeks out as far in advance as possible.  Today was going to be the only opportunity we had to go to the maze so we decided to brave the rain and go anyway.  When we got there, the rain had begun to taper off but it was kind of nice because there were hardly any people there.
Poor Av...at this point the sun was starting to peek through the clouds and Kevin had to run to the car and grab her sunglasses.  
We decided to let Ava determine which way we would go once inside the maze and she did a great job!  It was funny because the whole way through she kept saying, "Hey, there's some corn." "Hey, look, there's more of that corn!"  Don't think she got the concept that the maze was constructed solely out of corn.  But she had fun acting silly with it.
Here we are at one of the question checkpoints that was helping to guide us through the maze.
If you look closely, Kevin seems to have kind of a perturbed look on his face.  That may be because he had answered the last couple of questions incorrectly and I was giving him a hard time about it.  :)
Ava loved to help answer the questions and then she would take off running ahead of us.
This was my favorite question.  We probably looked like idiots standing there singing Pat-a-Cake over and over again.
All in all, we did pretty well.  We found our way out of the maze in 45 minutes which is better than the average hour it takes the majority of people.
After the maze, Ava went over to play on the jumping pillow.
At one point, she had the entire thing to herself.
She bounced for a few minutes and then she declared it not bouncy enough and was ready to go.  The concept is great but it didn't seem like it had a lot of bounce to it to me either.  
This weekend has been fun and we will be continuing the festivities throughout the next week and weekend.  And then Thanksgiving will be quickly approaching!  I cannot believe how quickly this year has flown by!!!!  

**Here is the link to the Fall Bucket List from the Loves of Life blog:  http://i1101.photobucket.com/albums/g431/LovesofLife/Fallbucketlist.jpg